 becky
becky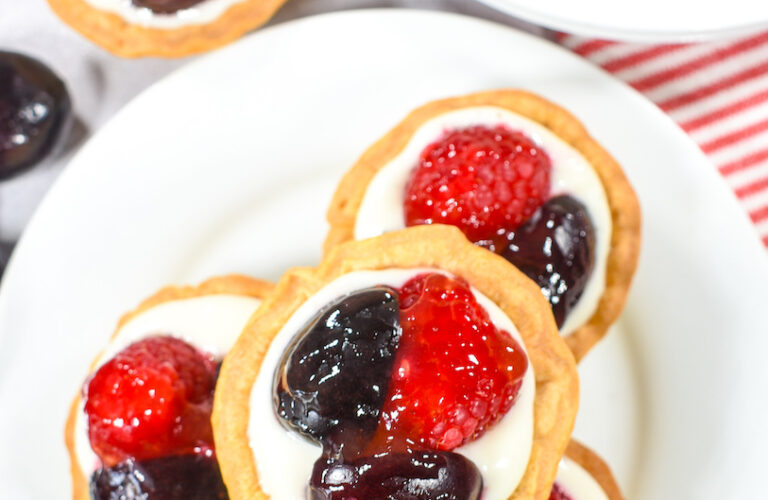
This post may contain affiliate links. Please read the disclosure policy to learn more.
Thank you for supporting this blog!
Original post published June 20th, 2017. Post last updated on March 29th, 2024.
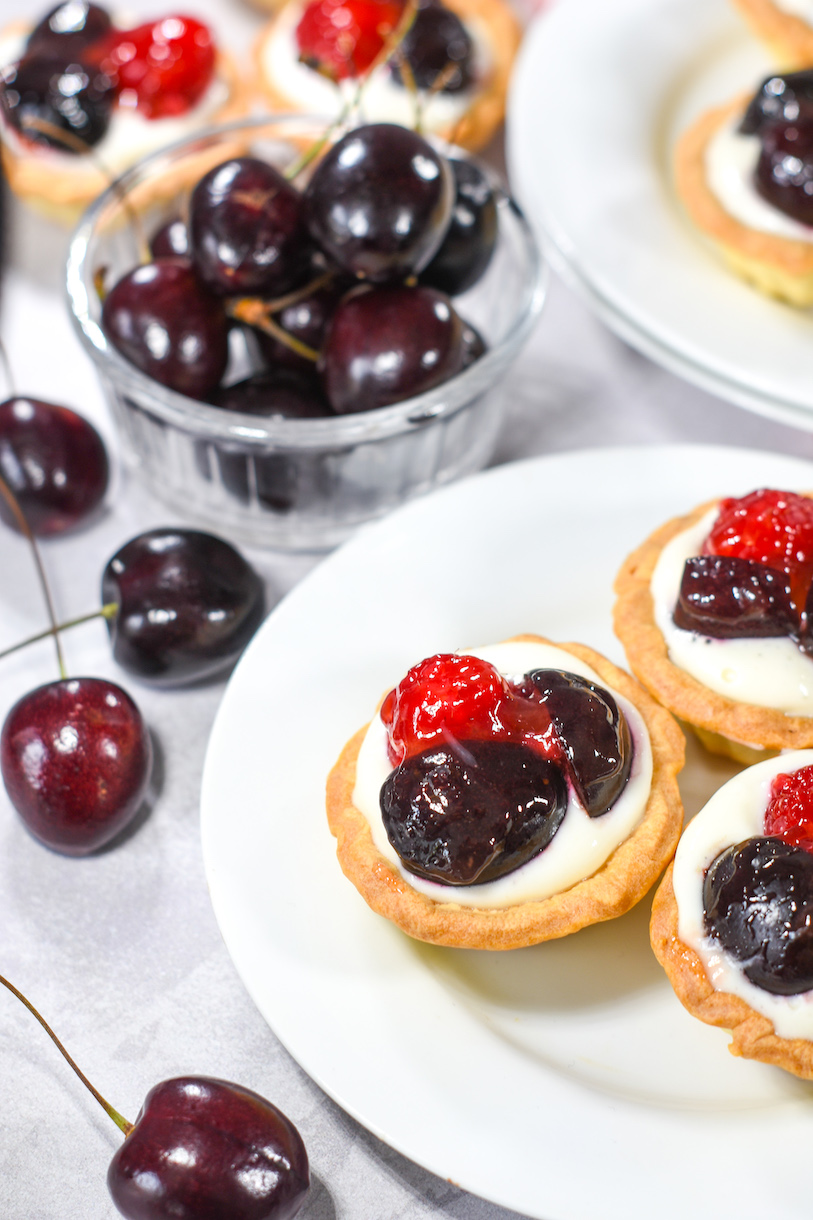
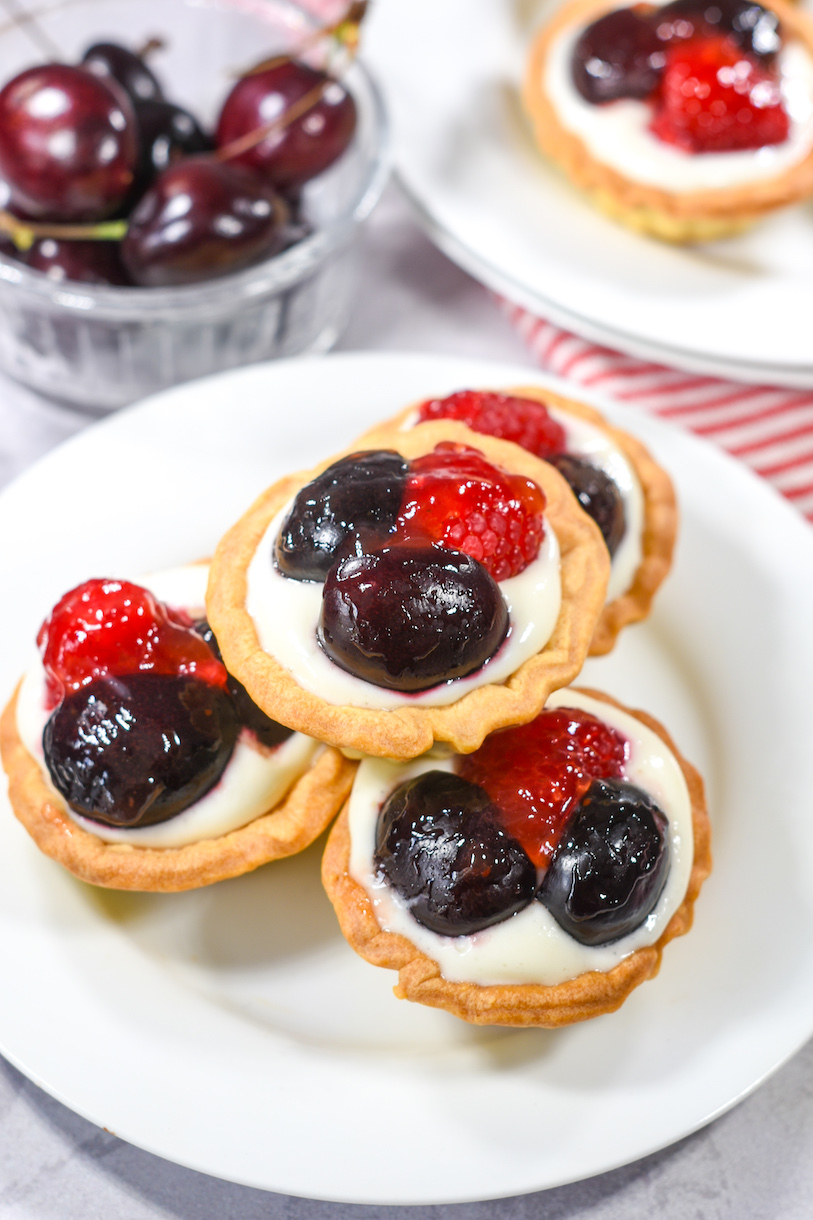
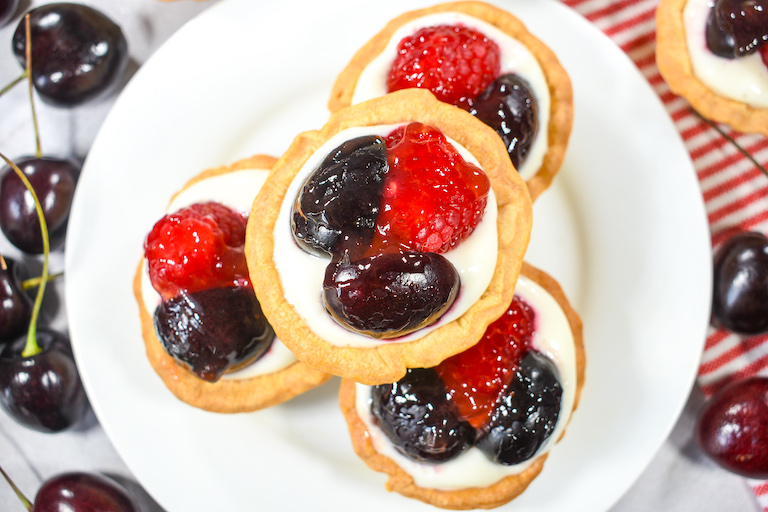
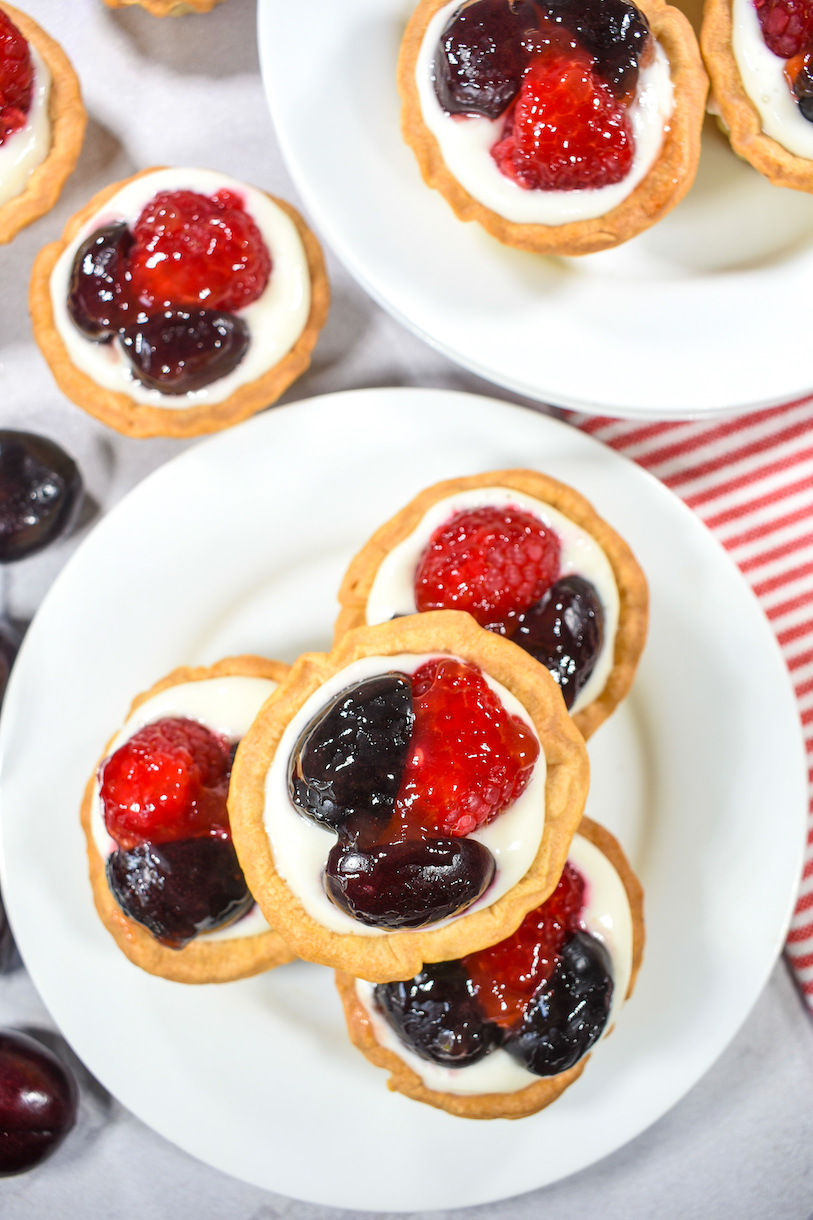
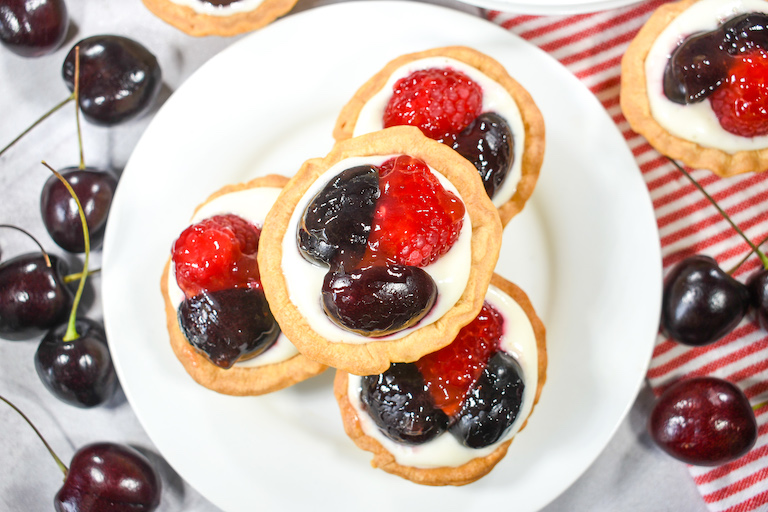
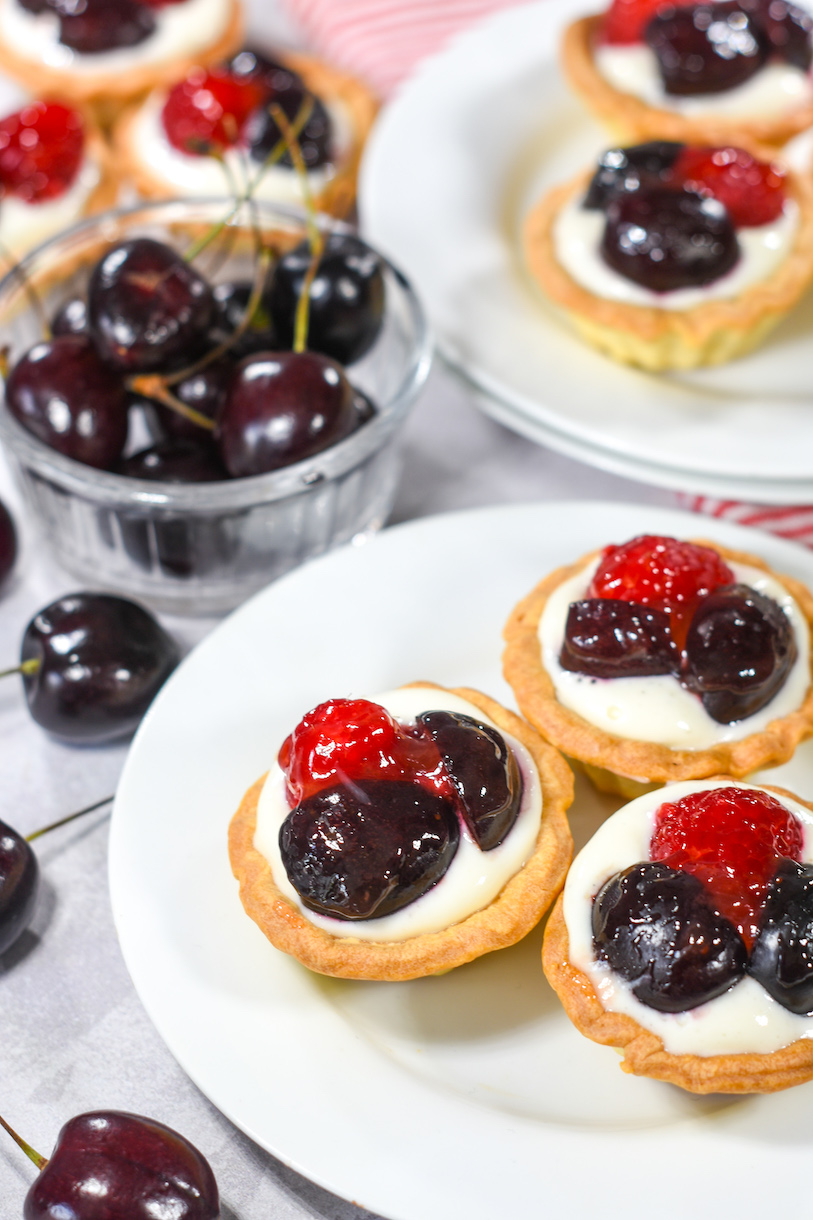
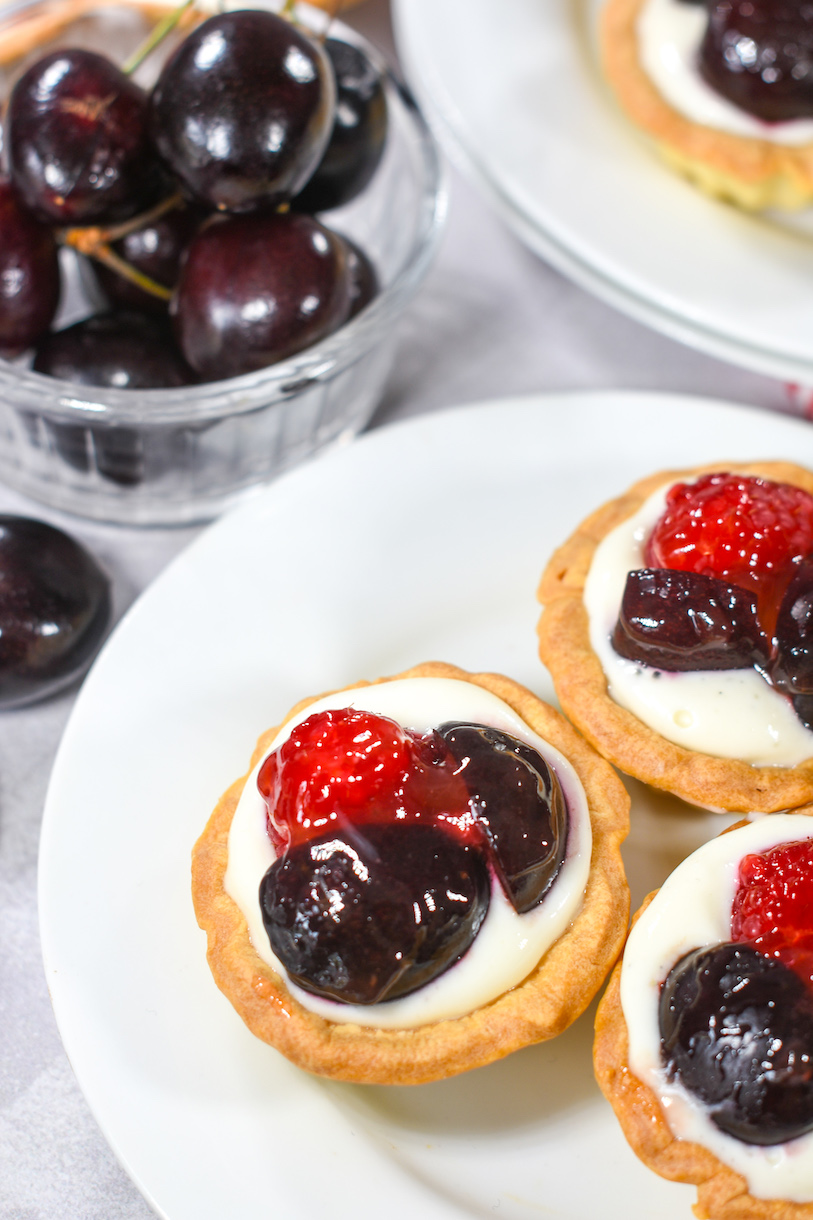
Made with store-bought shortcrust pastry, filled with cream cheese, and topped with fresh raspberries and cherries, this easy-to-make miniature berry tart recipe makes a great dessert for cookouts, picnics, and summer parties.
Why Make This Miniature Berry Tart Recipe?
I created this berry fruit tart recipe to utilize the bright, beautiful berries and cherries so readily available at greenmarkets and farmstands during the warm summer months.
In addition to showcasing vibrant seasonal produce, these little tarts make the perfect diminutive dessert to enjoy in hot weather. Theyre not too large or heavy, and are best enjoyed chilled.
You can prepare these mini berry tarts in less than an hour (plus some chilling time in the fridge!) They’re very easy to make, thanks to the store-bought pastry and simple filling made with three easy-to-find ingredients (sugar, cream cheese, and vanilla). After filling and chilling, just top the tarts with fresh berries and cherries, glaze with jam, and serve.
These tiny berry tarts make perfect finger food, with no plates or utensils required!
What Do I Need to Make This Berry Tart Recipe?
To prepare this mini fruit tarts recipe, you’ll need:
Shortcrust pastry or pie crust
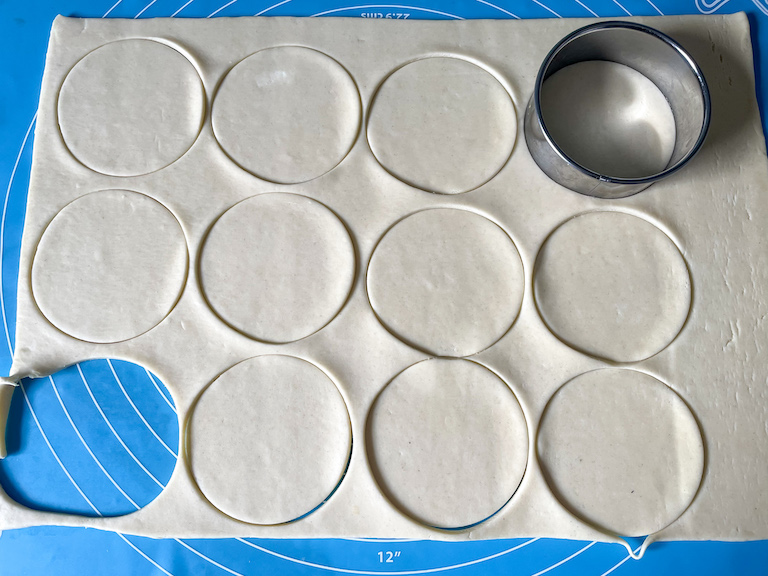
One sheet, wide enough to cut 12 3-inch discs. Sizes vary from brand-to-brand, so you might have to use a rolling pin to roll the pastry a few inches wider. Or, you might have some scraps of pastry left over.
If you have time, you can certainly make your crust from scratch. However, using a pre-made crust makes it easy to throw this recipe together for a last-minute gathering, or to prepare for a party when you’re short on time.
Round disc cutter
I cut my pastry with a 3-inch round metal cutter. (If you don’t own a set of round cutters, I highly suggest buying one!)
Pastry brush
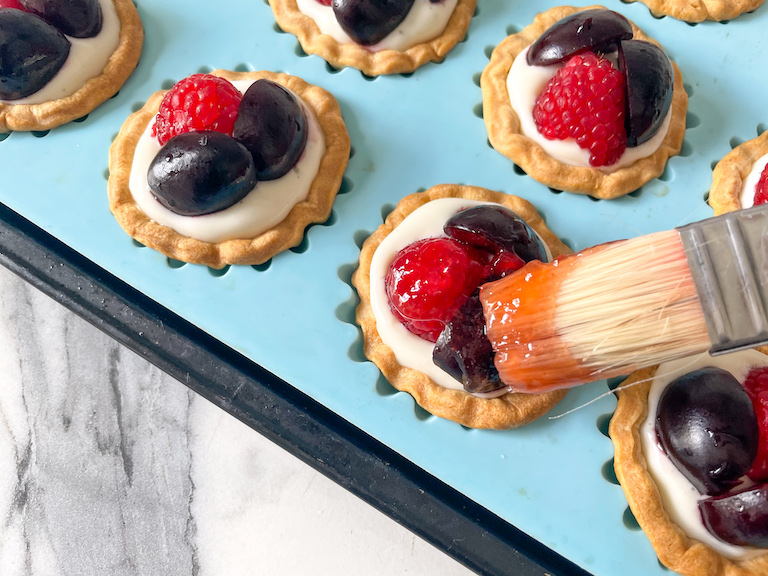
For applying the jam glaze. A 3/4-inch or 1-inch brush works best, and ideally one with natural (not silicone) bristles.
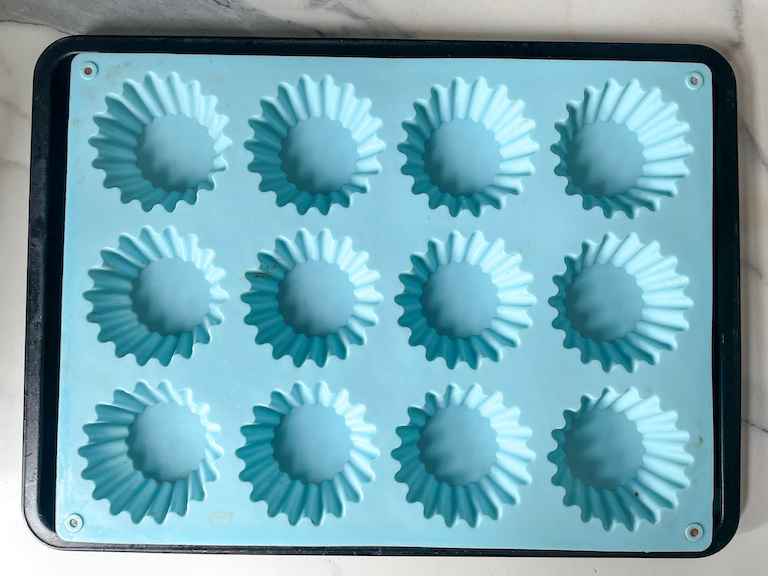
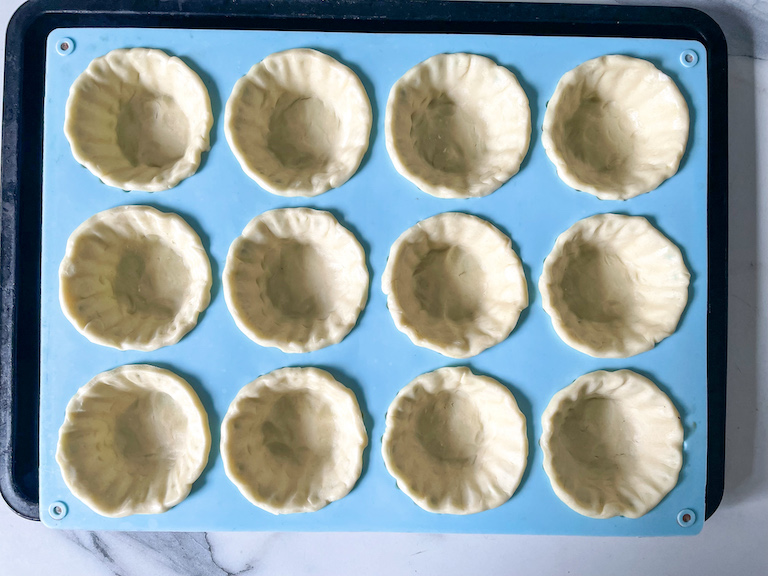
Silicone tartlet mould
These tarts gave me another chance to use silicone tarlet pan (it’s the same one I use for making homemade Mallo Cups) but you can also make this recipe with a silicone muffin pan instead.
Fresh fruit
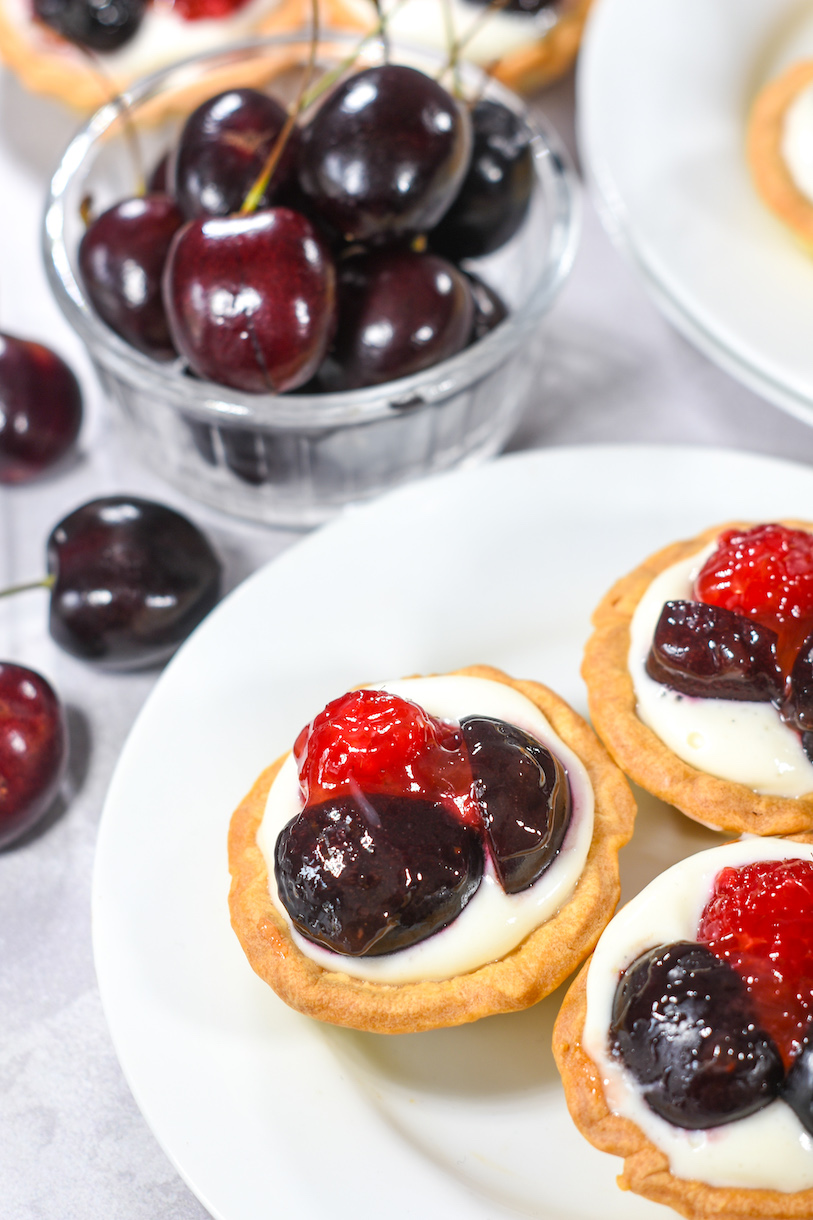
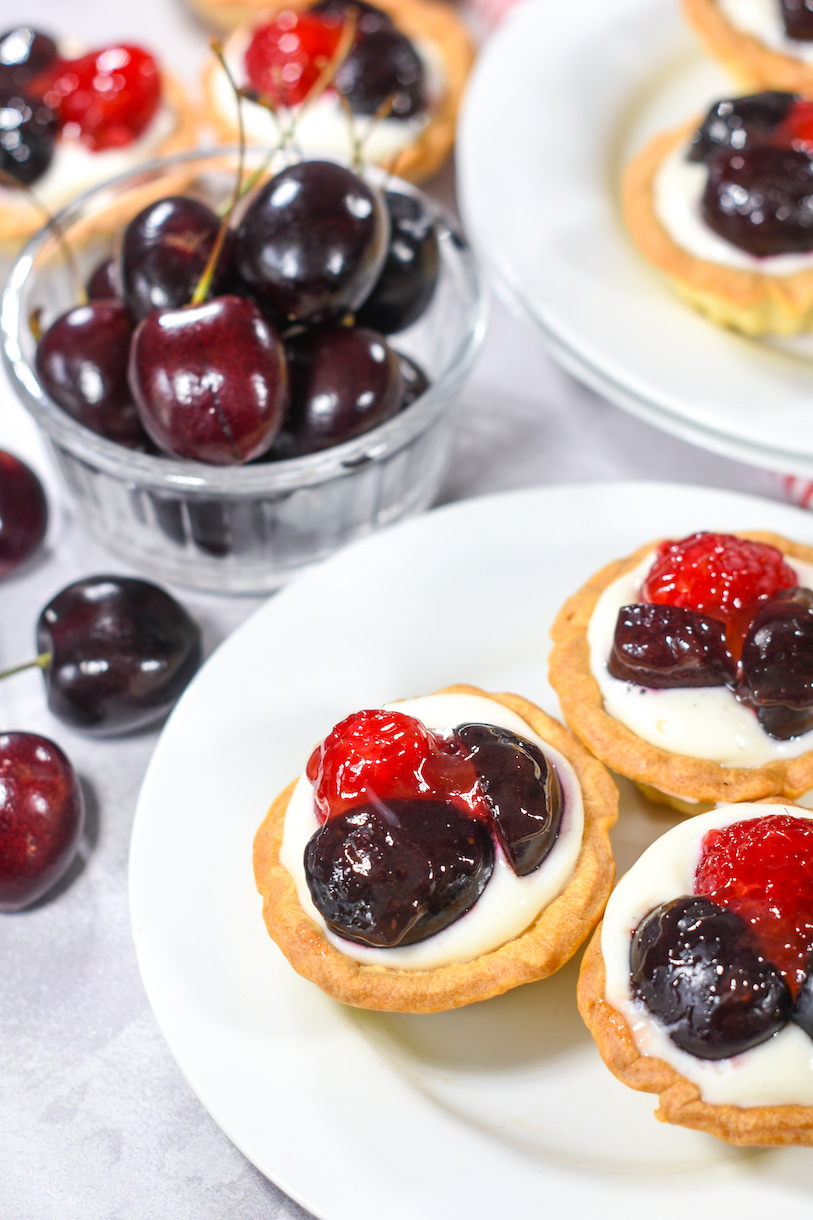
For topping the tarts. I’ve used raspberries and cherries, but I also offer some alternate options below.
Fruit jam
Store-bought jam stirred together with fresh lemon juice creates the sweet, juicy glaze. Raspberry, strawberry, or cherry jam will all work equally well.
Small stepped palette knife
For smoothing the cream cheese filling, and for transferring the tarts to a serving tray.
Disposable piping bag
I added my cream cheese filling to a disposable piping bag and piped it into the tart shells—it’s less messy than a spoon, and easier to distribute the filling easily. If you don’t have a piping bag, you can spoon the cheese mixture instead.
Berry Tart Tips and Tricks
I mixed my jam glaze in a mini saucepan on the stovetop, but you can warm it in the microwave instead. Either way, the goal is to heat the mixture just enough so that the jam melts, making it fluid and easy to brush on top of the fresh fruit.
When applying the glaze, brush it on the fruit parts only, not the cream cheese filling.
I suggest sitting your silicone tart pan on a quarter sheet tray (or other small baking tray). Because of the flimsy nature of silicone, I find that a sturdy tray makes it much easier to transfer the tarts to the fridge to chill.
Berry Tart Variations and Substitutions
You can adapt this tart recipe to utilize any fresh summer berries you happen to have on hand. Blueberries, strawberries, blackberries, and redcurrants will all work, either by themselves or in combination with one another.
Any type of jam will work for the glaze—raspberry, cherry, strawberry, blueberry, blackberry…take your pick. (Incidentally, this recipe offers a great solution for using up those few tablespoons of jam left in the bottom of a jar!) You can also swap the lemon juice for lime juice instead.
I don’t recommend using frozen berries for this recipe. (Frozen berries contain too much water, which will lead to soggy tarts.) If you don’t have fresh berries, you’re better off subbing in any kind of fresh fruit, rather than using frozen berries.
Make-Ahead and Storage Suggestions
You can bake the mini tart shells up to 24 hours in advance, then layer between sheets of parchment and store in an airtight container at room temperature until ready to fill. You can also fill the shells with the cream cheese mixture up to 6-8 hours in advance, and refrigerate until serving time.
I highly suggest waiting until you’re ready to serve to add the fresh berries and the glaze. Because they’re juicy and vibrantly colored, the cherries and raspberries can add a pink tint the cream cheese, so I don’t recommend adding the fruit in advance.
Store leftover tarts in the refrigerator for up to two days. They might not be as pretty on day two (and the pastry will probably be a bit soft) but they’ll still be totally edible.

More berry recipes you might enjoy:
Blueberry Hand Pies
Mixed Berry Breakfast Pastries
Cranberry Jelly Candy
Raspberry Cheesecake Brownies
Vegan Mixed Berry Crumble
And if you do make these, or any of my recipes, don’t forget to tag me @bastecutfold or use the hashtag #bastecutfold on Instagram. I always love to see what you’re making!

Miniature Berry Tarts
- Total Time: 1 hour 50 minutes
- Yield: 12 2-inch tarts 1x
Description
A mini berry tart recipe with cream cheese, raspberries, and cherries. This easy tartlet recipe is perfect for picnics and summer parties!
Ingredients
Tart Shells:
1 sheet pie crust or shortcrust pastry, thawed according to package directions if frozen
Cream Cheese Filling:
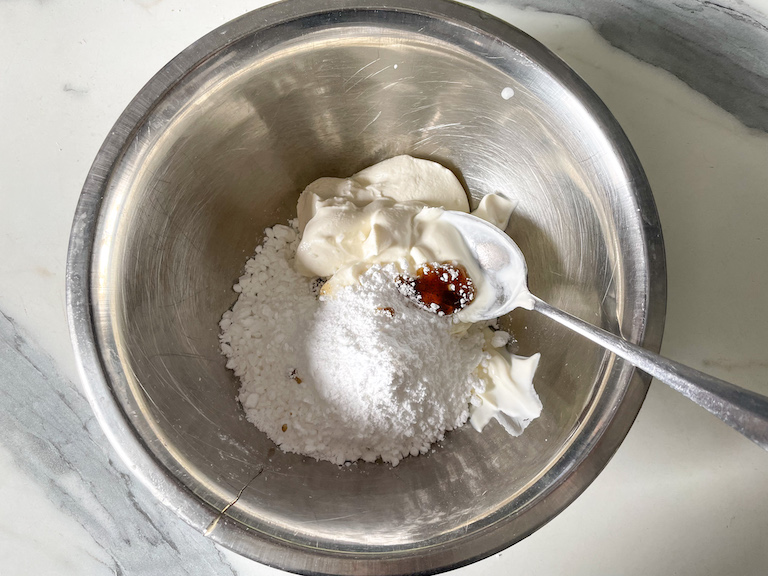
155 grams full-fat cream cheese (5 1/2 ounces)
70 grams confectioner’s sugar (1/2 cup)
1/2 teaspoon vanilla bean paste
Fruit Topping:
10 milliliters fresh lemon juice (2 teaspoons)
45 grams raspberry, cherry, or strawberry jam (2 tablespoons)
12 fresh sweet cherries, pitted and sliced
12 fresh raspberries
Instructions
Tart Shells:
Preheat oven to 400° F / 205° C. Place a 12-cup silicone tartlet pan on a quarter sheet baking tray.
Unroll shortcrust pastry on a silicone rolling mat.
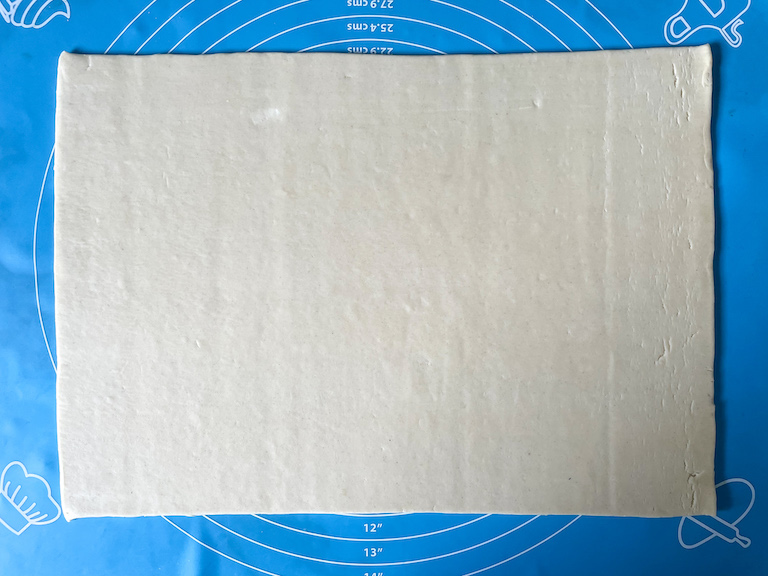
With a 3-inch round cutter, cut the pastry into 12 discs.
Place discs into silicone tartlet pan cavities, and use your fingertips to pat the pastry into each cavity. (If necessary, you can use a chopstick to push the pastry into the ridges of the mould.) Use a sharp knife to trim any excess dough.
Bake in preheated oven for 15-20 minutes, or until deeply golden brown.
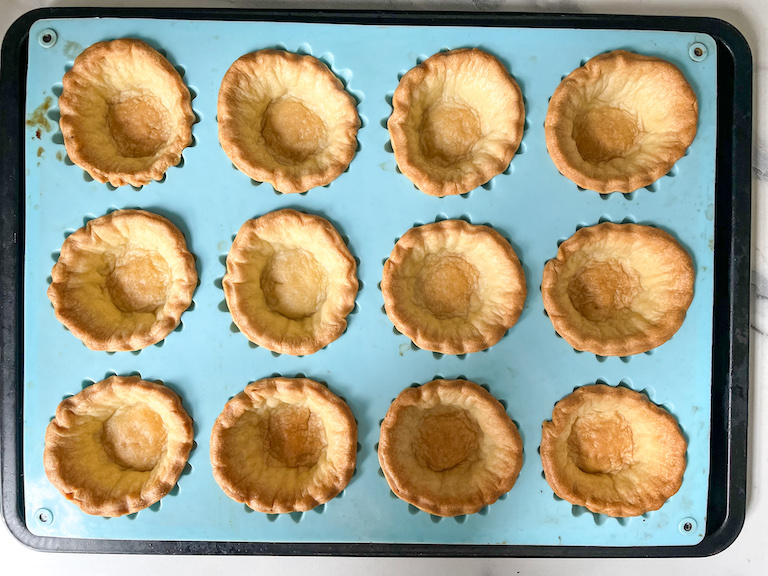
Transfer to a wire rack to cool while you prepare the filling.
Cream Cheese Filling:
In a medium bowl, combine cream cheese, confectioner’s sugar, and vanilla bean paste. Use a hand mixer to mix on medium speed until well-combined.
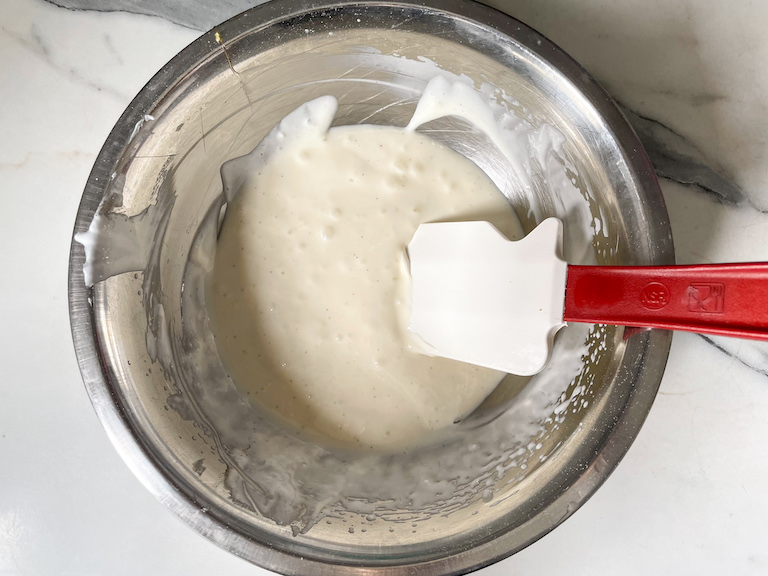
Transfer mixture to a piping bag. Pipe cream cheese filling into the cooled tartlet shells, then use a small stepped palette knife to smooth the tops.
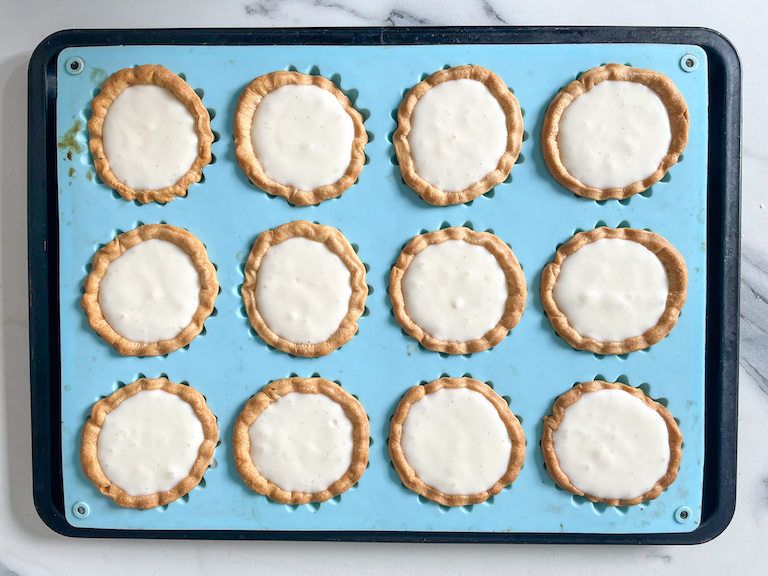
Transfer filled tarts to the refrigerator to chill, at least 1 hour.
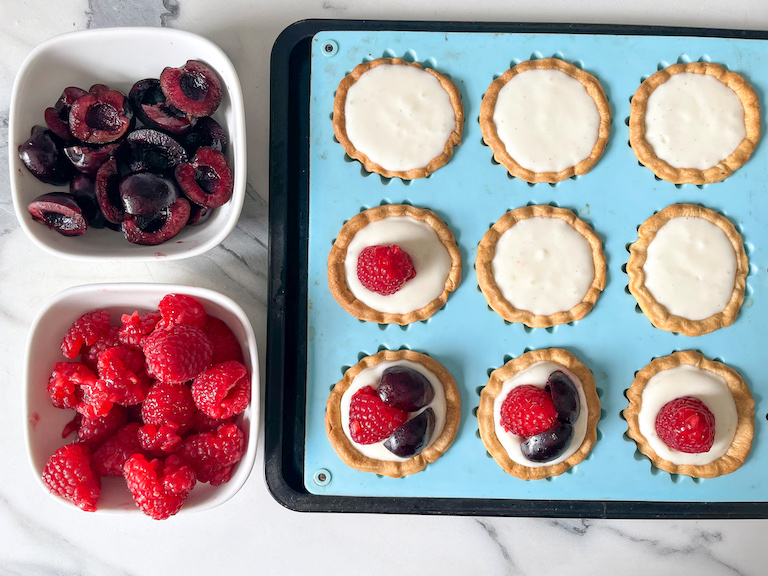
Fruit Topping:
In a small saucepan, combine lemon juice and jam. Warm gently over low heat. (If desired, you can warm the mixture in the microwave instead.)
Top each tartlet with a raspberry and two cherry halves.
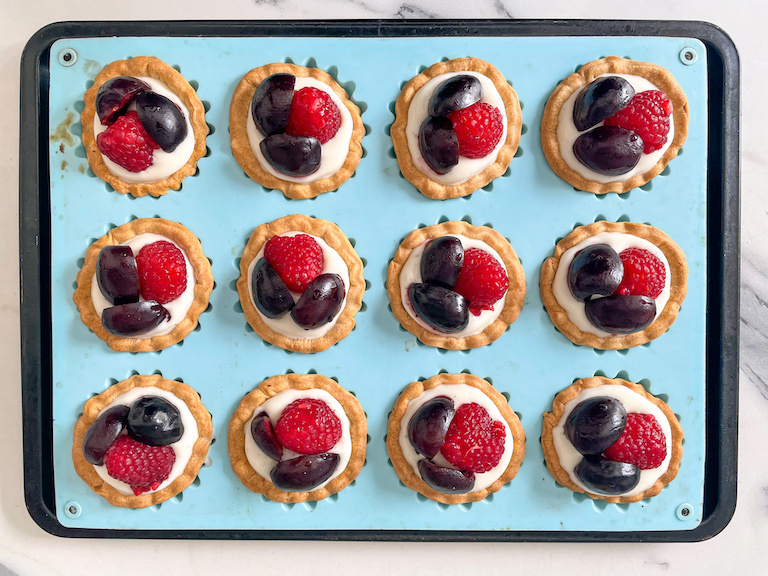
With a pastry brush, apply the jam mixture to the tops of each tart, covering the berry portion only.
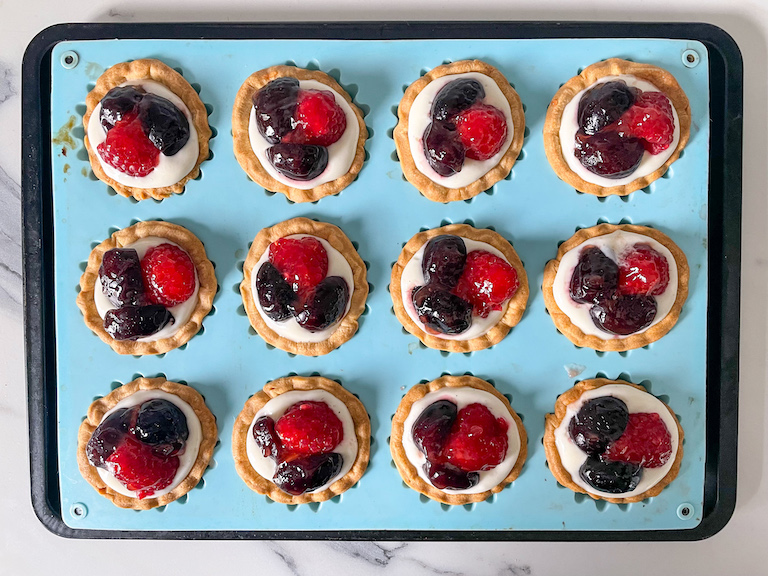
Serve immediately.
Store leftover tarts in an airtight container in the refrigerator for up to two days.


- Prep Time: 30 minutes
- Chilling Time: 1 hour
- Cook Time: 20 minutes
- Category: No Bake and Easy
- Method: Oven
- Cuisine: Dessert